Authentication Method: Margin uses RSA key pair authentication to connect to Snowflake. You’ll generate an RSA private key (.p8 file) and configure the public key on your Snowflake user.If you encrypt your private key with a passphrase, you’ll need to enter it in Margin during setup.

1. Snowflake Credential Setup

Margin needs a dedicated Snowflake user with:
  • scoped read access to the specific source schemas/tables you approve
  • permission to create and manage schemas in a designated workspace database
If you use an existing user, make sure it has both sets of privileges.

How Margin Integrates

ComponentDescription
Scoped read access to selected source tablesLets Margin model from approved source tables while your team controls exactly what is exposed (including masking and explicit exclusions).
Schema creation role in a designated databaseLets Margin create and manage its own schemas/tables for intermediate and final model outputs while keeping Margin artifacts isolated from your production schemas.
Margin does not write into your existing schemas. Everything Margin produces lives in schemas created under your designated workspace database.

Create a Snowflake User

Below is a step-by-step guide to set up a Snowflake user with the necessary permissions:
Generate RSA Key PairRun these commands in your terminal to generate your private key and public key:
$ openssl genrsa 2048 | openssl pkcs8 -topk8 -inform PEM -out rsa_key.p8
$ openssl rsa -in rsa_key.p8 -pubout -out rsa_key.pub
FileWhat to do with it
rsa_key.p8Upload to Margin during setup (keep secure)
rsa_key.pubCopy contents into the ALTER USER statement below
If you set a passphrase, remember it. You will need to enter it in Margin.
Locations to fill in required fields are highlighted in green
-- Margin user/role details
SET margin_default_warehouse = '<warehouse>';          -- e.g. 'COMPUTE_WH'
SET margin_workspace_database = '<workspace_database>'; -- e.g. 'MARGIN_WORKSPACE_DB'
SET source_database = '<source_database>';             -- e.g. 'APP_DB'
SET source_schema   = '<source_schema>';               -- e.g. 'EVENTS_SCHEMA'
SET source_table_1  = '<table_1>';                     -- e.g. 'PAYMENT_EVENTS'
SET source_table_2  = '<table_2>';                     -- e.g. 'KYC_EVENTS'
SET margin_comment = 'For Margin integrations';

-- Use a high-privileged role and create Margin role/user
USE ROLE ACCOUNTADMIN;

CREATE ROLE IF NOT EXISTS MARGIN_ROLE
COMMENT = $margin_comment;

CREATE USER IF NOT EXISTS MARGIN_USER
DEFAULT_WAREHOUSE = $margin_default_warehouse
DEFAULT_ROLE = MARGIN_ROLE
COMMENT = $margin_comment;

ALTER USER MARGIN_USER
SET RSA_PUBLIC_KEY='MIIB...'; -- Copy the public key from the step above

GRANT ROLE MARGIN_ROLE TO USER MARGIN_USER;
---------------------------------------------------------------------------
-- Warehouse usage for query execution
---------------------------------------------------------------------------
GRANT USAGE ON WAREHOUSE identifier($margin_default_warehouse)
  TO ROLE MARGIN_ROLE;

---------------------------------------------------------------------------
-- Workspace database where Margin can create/manage its own schemas
---------------------------------------------------------------------------
GRANT USAGE ON DATABASE identifier($margin_workspace_database)
  TO ROLE MARGIN_ROLE;

GRANT CREATE SCHEMA ON DATABASE identifier($margin_workspace_database)
  TO ROLE MARGIN_ROLE;
---------------------------------------------------------------------------
-- Grant database + schema usage for the source data you want Margin to read
---------------------------------------------------------------------------
GRANT USAGE ON DATABASE identifier($source_database)
  TO ROLE MARGIN_ROLE;

SET grant_schema_usage_sql_command = 'GRANT USAGE ON SCHEMA '
  || $source_database || '.' || $source_schema || ' TO ROLE MARGIN_ROLE';

EXECUTE IMMEDIATE $grant_schema_usage_sql_command;
Copy and paste for each table you want Margin to read:
----------------------------------------------------------------------------
-- Table-level SELECT for <table_1>
----------------------------------------------------------------------------
SET grant_table_select_1 = 'GRANT SELECT ON TABLE '
  || $source_database || '.' || $source_schema || '.' || $source_table_1
  || ' TO ROLE MARGIN_ROLE';

EXECUTE IMMEDIATE $grant_table_select_1;

----------------------------------------------------------------------------
-- Table-level SELECT for <table_2>
----------------------------------------------------------------------------
SET grant_table_select_2 = 'GRANT SELECT ON TABLE '
  || $source_database || '.' || $source_schema || '.' || $source_table_2
  || ' TO ROLE MARGIN_ROLE';

EXECUTE IMMEDIATE $grant_table_select_2;
Configure the columns you want to mask in specific tables.
  • Recommended: Use Option 1: built-in masking policies if you have Snowflake Enterprise.
  • Otherwise, Option 2: secure views lets you expose a restricted projection.
----------------------------------------------------------------------------
-- Snowflake masking policies are strongly typed. Create one policy per type.
----------------------------------------------------------------------------

CREATE OR REPLACE MASKING POLICY HIDE_STRING_FROM_MARGIN AS (VAL STRING) RETURNS STRING ->
  CASE
    WHEN CURRENT_ROLE() = 'MARGIN_ROLE' THEN '****'
    ELSE VAL
  END;

CREATE OR REPLACE MASKING POLICY HIDE_NUMBER_FROM_MARGIN AS (VAL NUMBER) RETURNS NUMBER ->
  CASE
    WHEN CURRENT_ROLE() = 'MARGIN_ROLE' THEN 0
    ELSE VAL
  END;

CREATE OR REPLACE MASKING POLICY HIDE_DATE_FROM_MARGIN AS (VAL DATE) RETURNS DATE ->
  CASE
    WHEN CURRENT_ROLE() = 'MARGIN_ROLE' THEN NULL
    ELSE VAL
  END;

CREATE OR REPLACE MASKING POLICY HIDE_VARIANT_FROM_MARGIN AS (VAL VARIANT) RETURNS VARIANT ->
  CASE
    WHEN CURRENT_ROLE() = 'MARGIN_ROLE' THEN NULL
    ELSE VAL
  END;

ALTER TABLE <database>.<schema>.<table>
  MODIFY COLUMN <secret_string_column> SET MASKING POLICY HIDE_STRING_FROM_MARGIN;
Margin creates and manages its own schemas inside your designated workspace database.
USE DATABASE identifier($margin_workspace_database);

CREATE SCHEMA IF NOT EXISTS margin_validation_schema;
CREATE OR REPLACE TABLE margin_validation_schema.permission_check (id INT);
DROP TABLE margin_validation_schema.permission_check;
DROP SCHEMA margin_validation_schema;
This grants control only where explicitly allowed. MARGIN_USER cannot create users/roles or access objects that are not granted to MARGIN_ROLE.
If you need to connect to multiple databases, reach out to [email protected], we can enable this for you.

2. Snowflake Connection Configuration

A. Add a Snowflake Source in Margin

Go to your Integrations page in the Margin dashboard & click Add Source and select Snowflake.
Connect to Snowflake

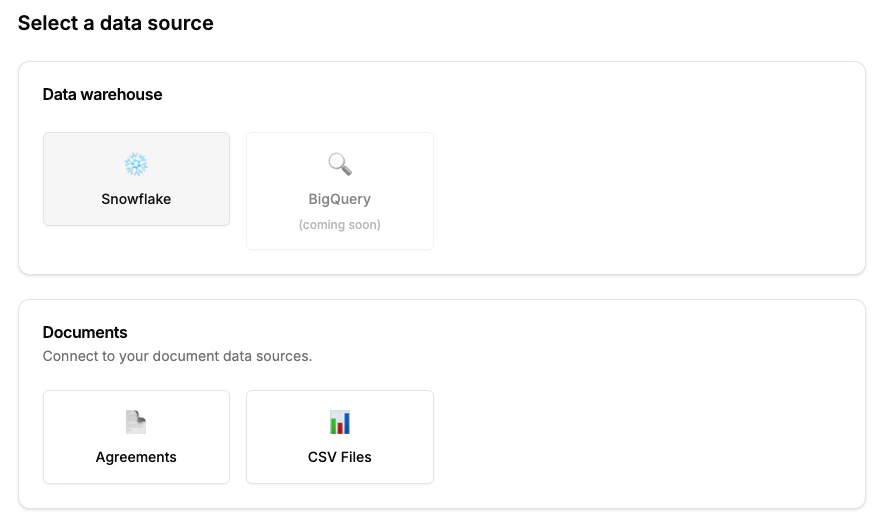
B.Enter Snowflake Credentials

Enter the following required fields into Margin:
FieldDescription
Account IdentifierAccount Name prefixed by its Organization (e.g. myorg-account123). Format may differ based on Snowflake account age. For details, visit Snowflake docs.
WarehouseThe warehouse name Margin should use to run queries.
DatabaseThe default database for Margin queries.
UsernameThe Snowflake user you created (e.g., MARGIN_USER).
Private Key (.p8)The RSA private key file generated during credential setup.
Private Key Passphrase(Optional) Required if your private key is encrypted with a passphrase.
RoleThe role you created (or an existing role with the necessary privileges).
Snowflake accounts can have different identifier formats depending on when they were created. For example, older accounts might look like ACCOUNT_LOCATOR.CLOUD_REGION_ID.CLOUD, while newer ones may look like ORGNAME-ACCOUNT_NAME. Check Snowflake’s documentation if unsure.

3. Testing the Connection

When you set up Snowflake, Margin verifies:
  1. Basic connectivity check: Network connection & credential validation
  2. Verify user can create/manage objects in Margin-managed schemas:
    • Table lifecycle (CREATE, INSERT, SELECT, UPDATE, DELETE, RENAME, DROP)
    • View lifecycle (CREATE, RENAME, DROP)
    • Create/Drop STAGE
    • Create/Drop FILE FORMAT
Sometimes the initial test might time out, especially if Snowflake is resuming from a suspended state. Simply click Test again to retry. Once a connection is established, further requests usually run quickly.

Troubleshooting

Authentication failures

  • Ensure you’re using an RSA private key (.p8 file), not an SSH key
  • Verify the public key is set on your Snowflake user: DESC USER MARGIN_USER
  • If you used a passphrase when generating the key, enter it in Margin

Permission errors during testing

  • The wizard shows exactly which permissions are missing
  • Ensure you completed Step 2 (workspace database permissions), Step 3 (schema USAGE), and Step 4 (table SELECT grants) in the setup script

Connection timeout

  • Snowflake warehouses may be suspended—click “Test” again to retry
  • Check that your account identifier format is correct

Next Steps

Once the connection is established, you can connect your finance sources to model over your event data.

Sources: Finance Data

Connect your finance data sources